


Collect all photos you have of these blue and yellow cat outfits, designed by Owe Sandström. I had the pleasure of meeting him in 1995 and got a pic and autograph. There are lots of costume pics on Facebook that were taken at ABBAWorld. Print several to have in front of you for easy reference for the size of the paintings and the colours.
Download the YouTube vids of the outfits, especially SOS Momarkedet 1975 and I Do I Do Momarketdet 1975.
COSTS (four dresses)
Dressmaker: $360 ($90 each outfit).
Material $157.53 (this would have cost half as much, but I later found a glossier batch of satin. Allow for mistakes!)
Dress pattern $17.25
Studs (pearl) $44.84
Paints $46.70
Louise’s paints $40
Curved ruler $12.95
Padded white tablecloth $5
(Lost receipts for these)
Pencils, 2B, 6B
Thick, heavy tracing paper (about $10 for several sheets)
Paint brushes sizes 12, and 2 (about $5 each)
OTHER STUFF
Dishwashing detergent
Water
Plastic containers for paints
Nail file
Hair dryer
Thick paper towels
Plastic place mat to separate sides of dress
COLOURS
Setacolour Opaque Buttercup 45mL
Setacolour Shimmer Purple
Setacolour Shimmer Electric Blue
Setacolour Opaque Oriental Blue
Seta Finishing 110mL silver glitter
Setacolour Shimmer 45mL Light Copper
Also, brown, white, black, red
STEP 1
Buy everything. This will take several trips and many months to finally track down all the items. Well, it did for me and Louise!
STEP 2
Visit various dressmakers and BEG them to make the outfits. Most will refuse, as the white satin is easily marked by sewing machine oil or anything. One said to make it pristine with no marks would cost $500 for each tunic! The same one did it for $90 each, but no guarantees of being pristine. They turned out fine, though she refused to bang in the studs, and departed from my request and made the belts with pointy ends because “I think they look better that way.” I would have preferred if she’d followed my instructions rather than her whims. The satin has a few little “catches” (like small pantyhose ladders) in the making process, but it was inevitable, as it’s very easy to ladder, and she’s warned me about it beforehand. Overall, very happy with her dresses, she’s an excellent practitioner.
If you’re not an experienced dressmaker, don’t make it yourself, as there are areas that need interfacing and reinforcing (the neck area and where the studs go in) that are tricky.
STEP 3
Bang in the studs. I practised with a plain stud first. Then I cracked a few pearls on the first couple of studs, but the others were OK. Neighbours complained. I only banged in studs for two dresses. About 50 hammering bangs for each dress (six studs with two pieces each).
Have a nail file nearby at all times, as any mildly chipped nail will pull and ladder the material.
STEP 4
Put dress on dressmaker mannequin (about $350). Or a coathanger ($1).
STEP 5
I used the pics on the Australian ABBA Bubblegum cards for inspiration for drawing the names on the backs.
On the back on the dress, used a curved ruler and measure the size you need to draw the ABBA names.
Using the curved ruler, measure the curve and the halfway mark. Then draw this on paper.
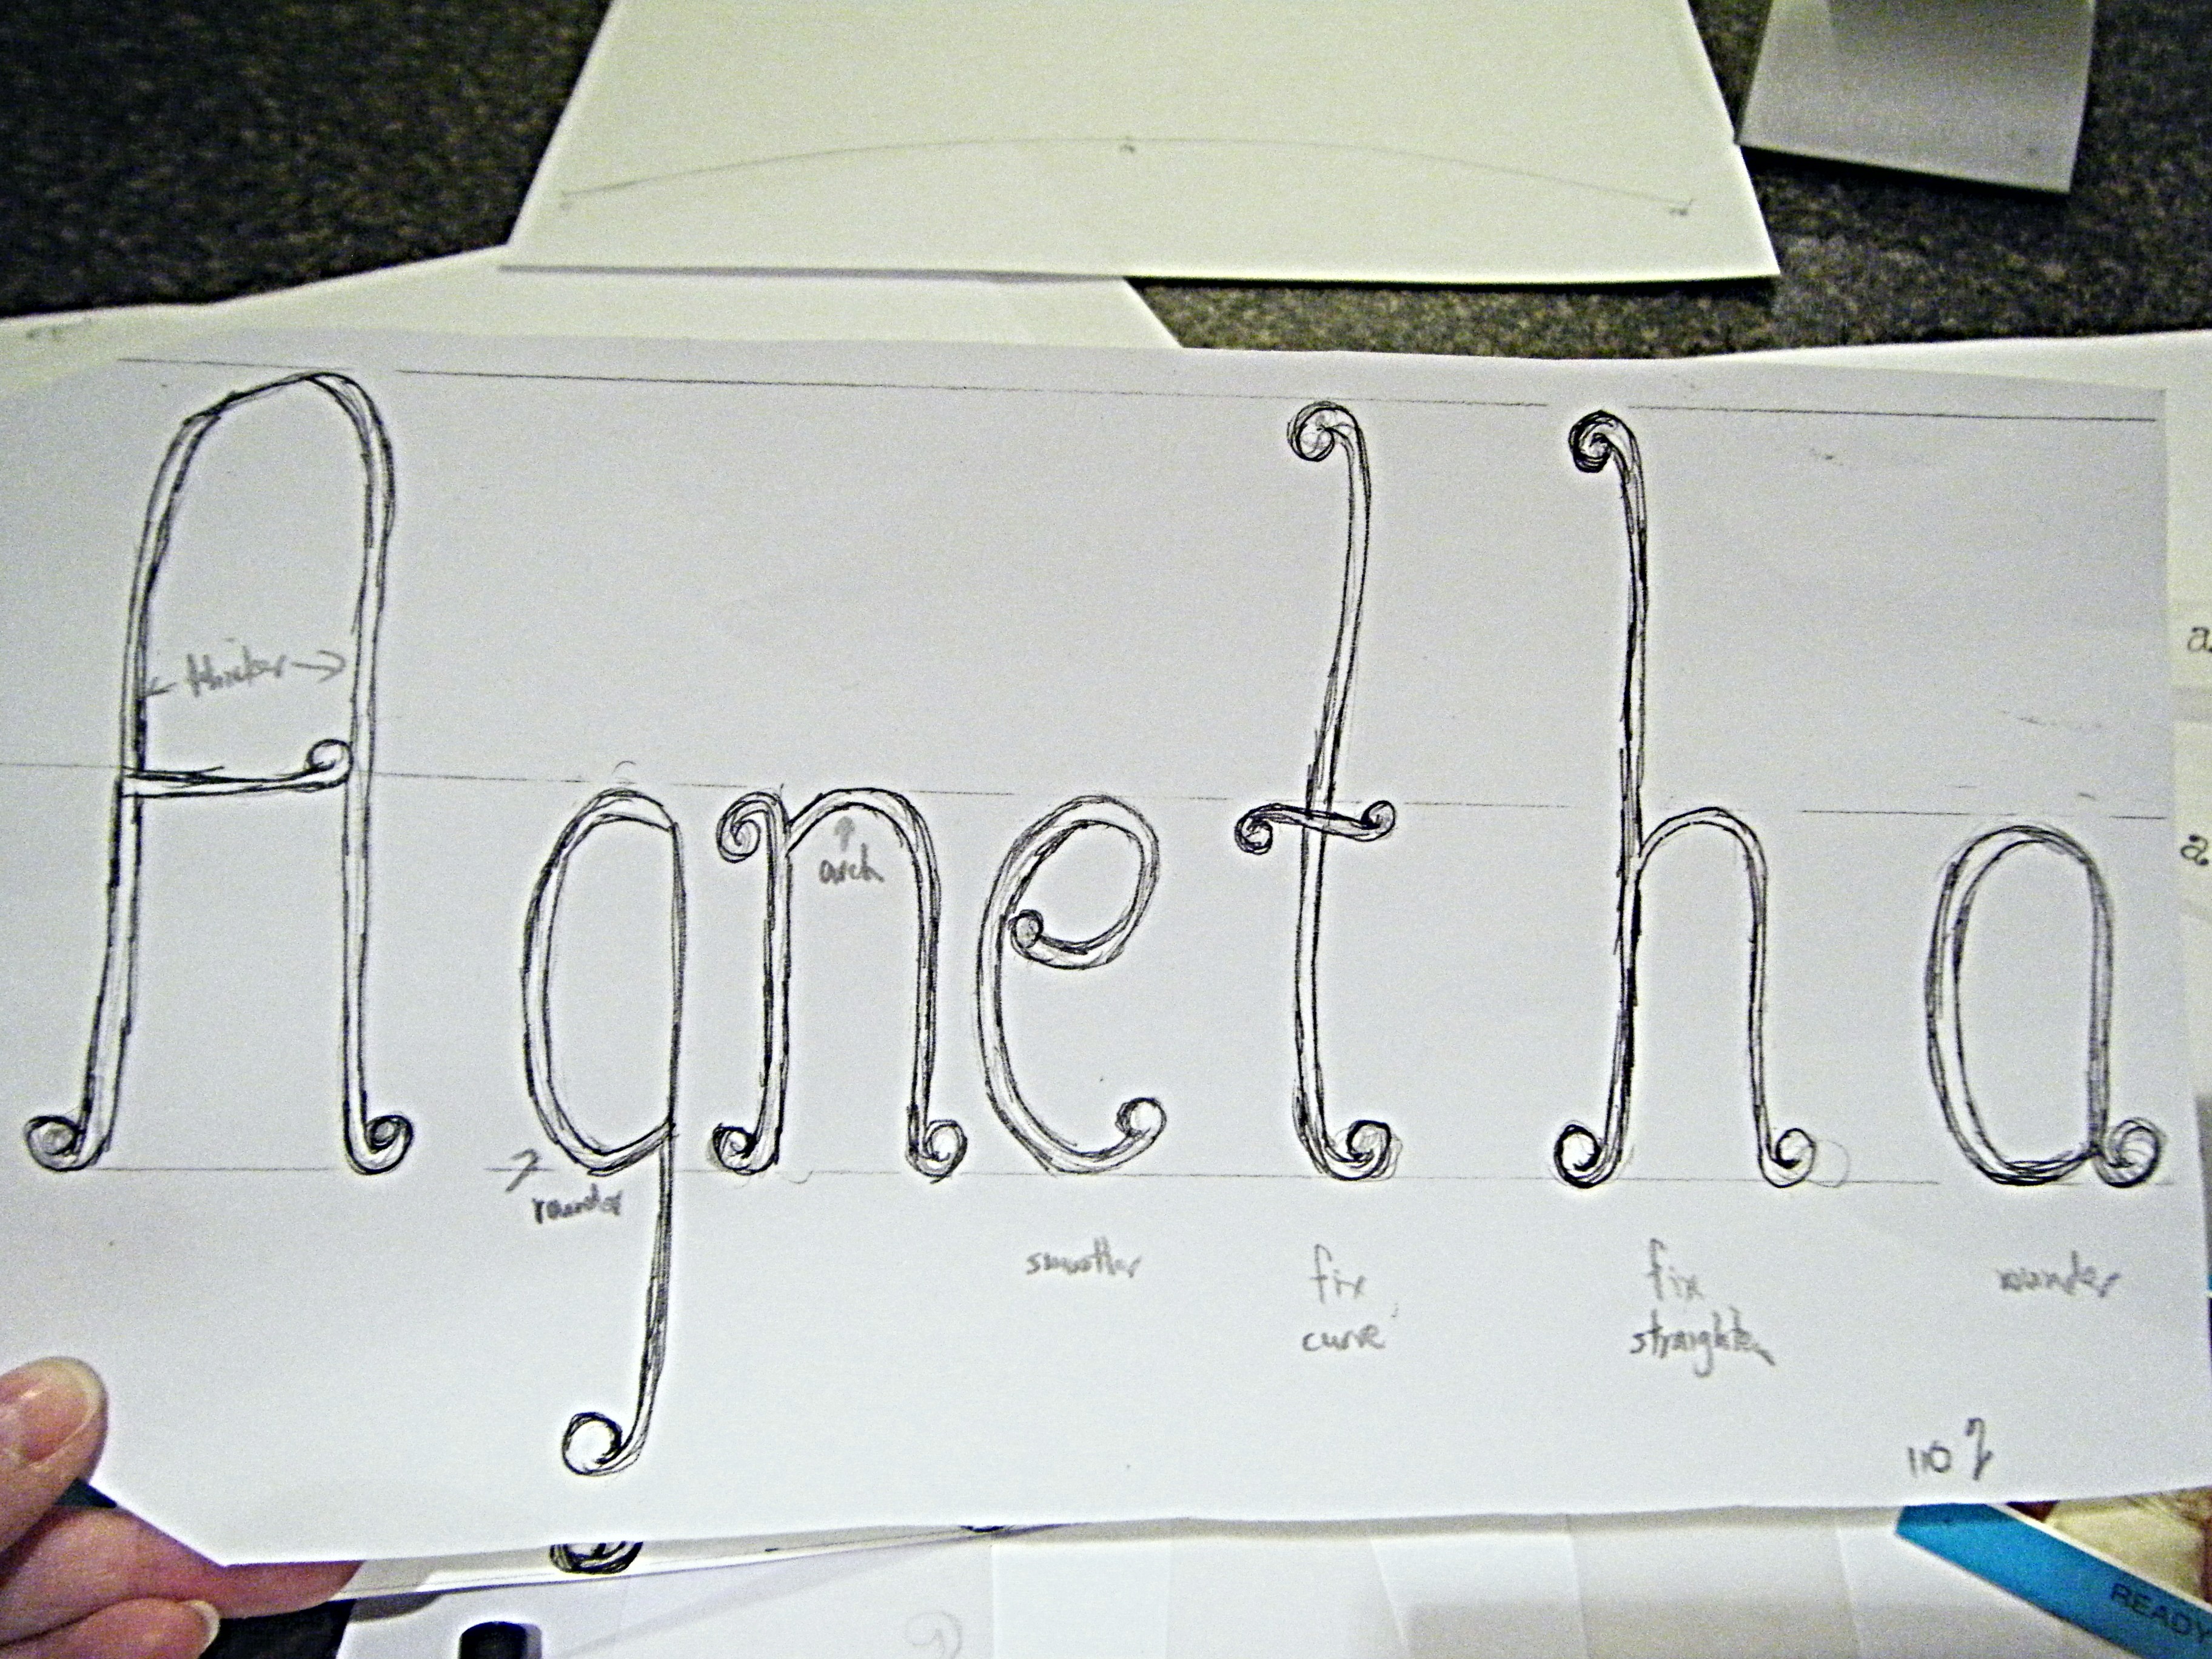
Gather pictures of the ABBA names and draw them up.
Do a rough outline first, keep improving it.
Once you’re happy with the ABBA names spelt in a straight line, cut out each of the letters and stick them on the curved line.
Now, copy the name onto the heavy tracing paper with a 2B pencil and write “Right side” on it.
Then go over the back of the name with a 6B pencil.
STEP 6
Put your white plastic padded tablecloth on a big bench (keep the bench pristine clean) and place the satin dress on it. I was using my main kitchen bench and had all my paint pots in the sink and couldn’t risk cooking any foods that would stain the white satin, so I lived on microwaved porridge for a week! But it was worth it.
Place a plastic placemat and a thick paper towel between the two layers of the satin dress.
Pin the tracing paper onto the dress and press down over the pattern with a sharp 2B pencil. Pins won’t ladder the satin.
STEP 7
Use the lighter colour first, paint the name in. Then darker colour. Blow dry for five minutes, then retouch about five times til it looks decent. Blow dry frequently or hang it near a fan heater.
If you have any accidents, use dishwashing detergent immediately, it’ll get it all off.
STEP 8
Gather all your ABBA cat costume pictures and draw an outline.
I started off doing this, and asking my arty friends for help.
Finally, I found a fan who had a T-shirt with the designs, though it’s slightly squashed/out of proportion. After traveling over the Sydney Harbour Bridge to have a pleasant lunch date with him, he allowed me to take some photos and a photocopy.
STEP 9
Place cat picture against dress. Measure it up. I used a Proportion Wheel, from my old layout subbing days. Or use this online one.
STEP 10
Go to a printing shop and get cat picture blown up from A4. This’ll be on a big sheet of paper, bigger than A3. About $1.20 a copy, and get several sizes, from 110 to 130 per cent.
STEP 11
Place photocopy against dress, pick which size fits best.
STEP 12
Get your heavy tracing paper and 2B pencil and trace over the cat picture. Write “Right side” on the proper side. (I didn’t do this, and ended up putting the cat picture on the dress, facing the wrong way! I had to go back and correct it.)
STEP 13
On the reverse side of the tracing paper, use your 6B pencil and go over the cat picture again.
STEP 14
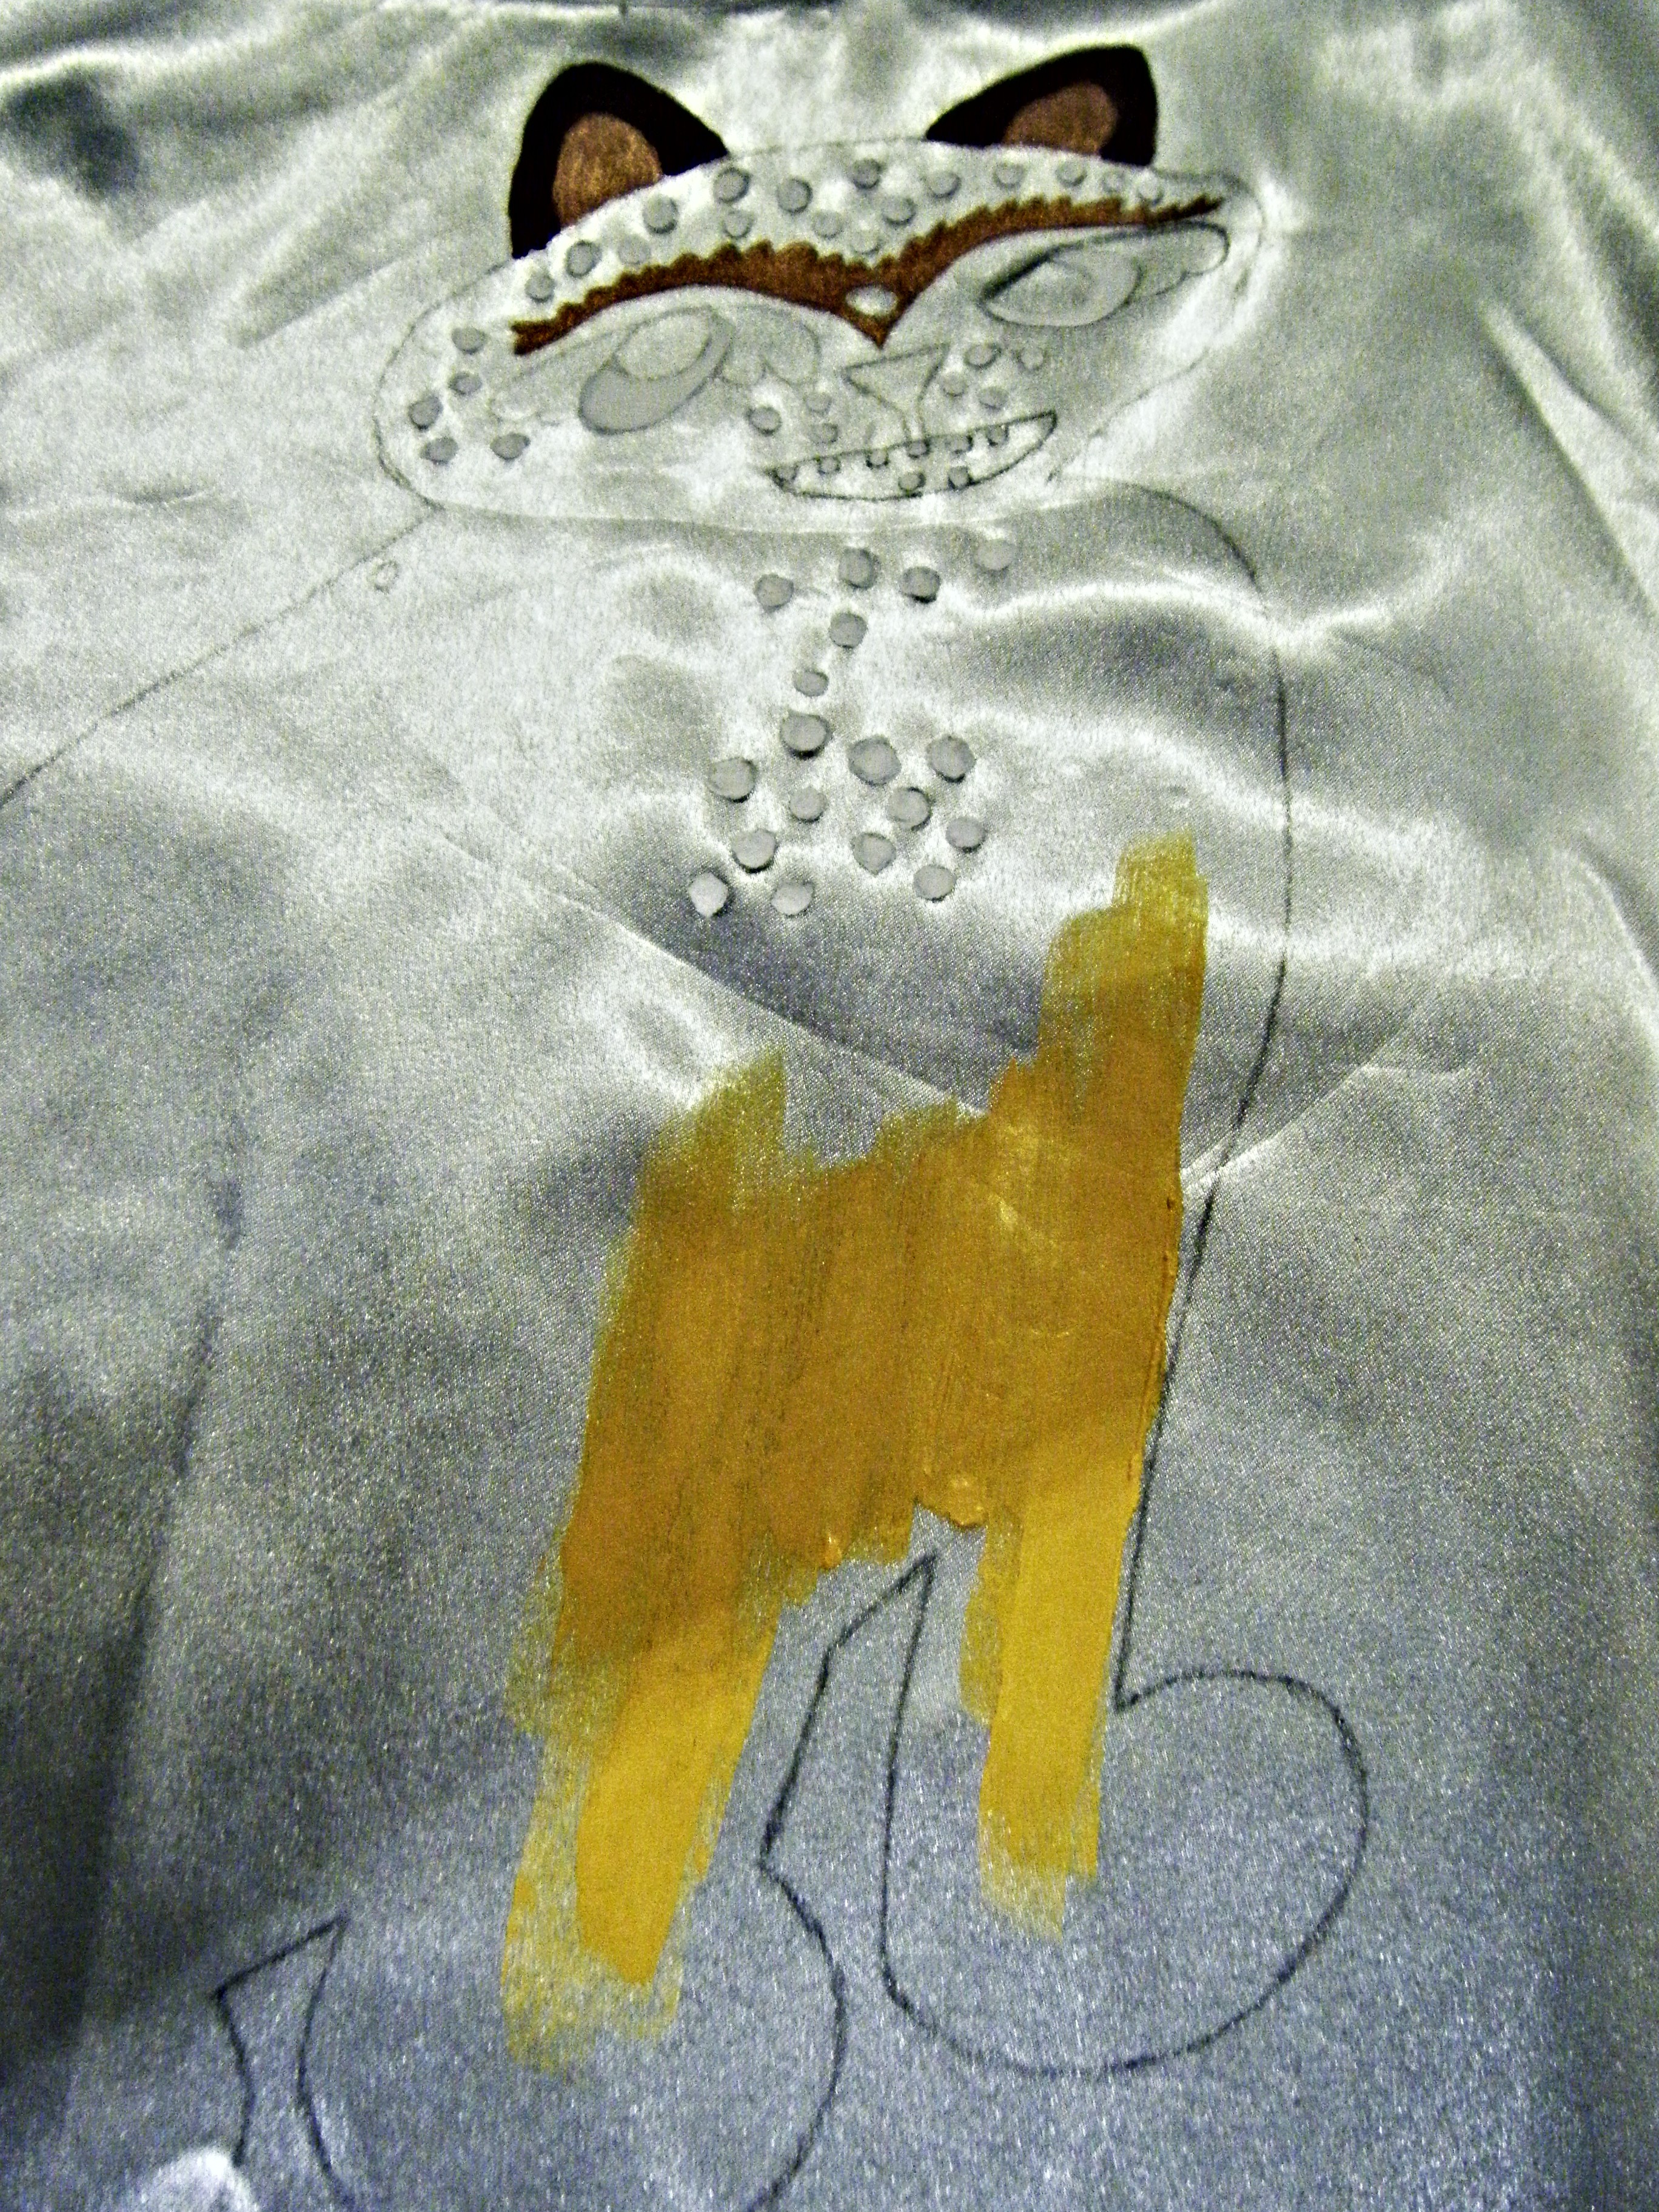
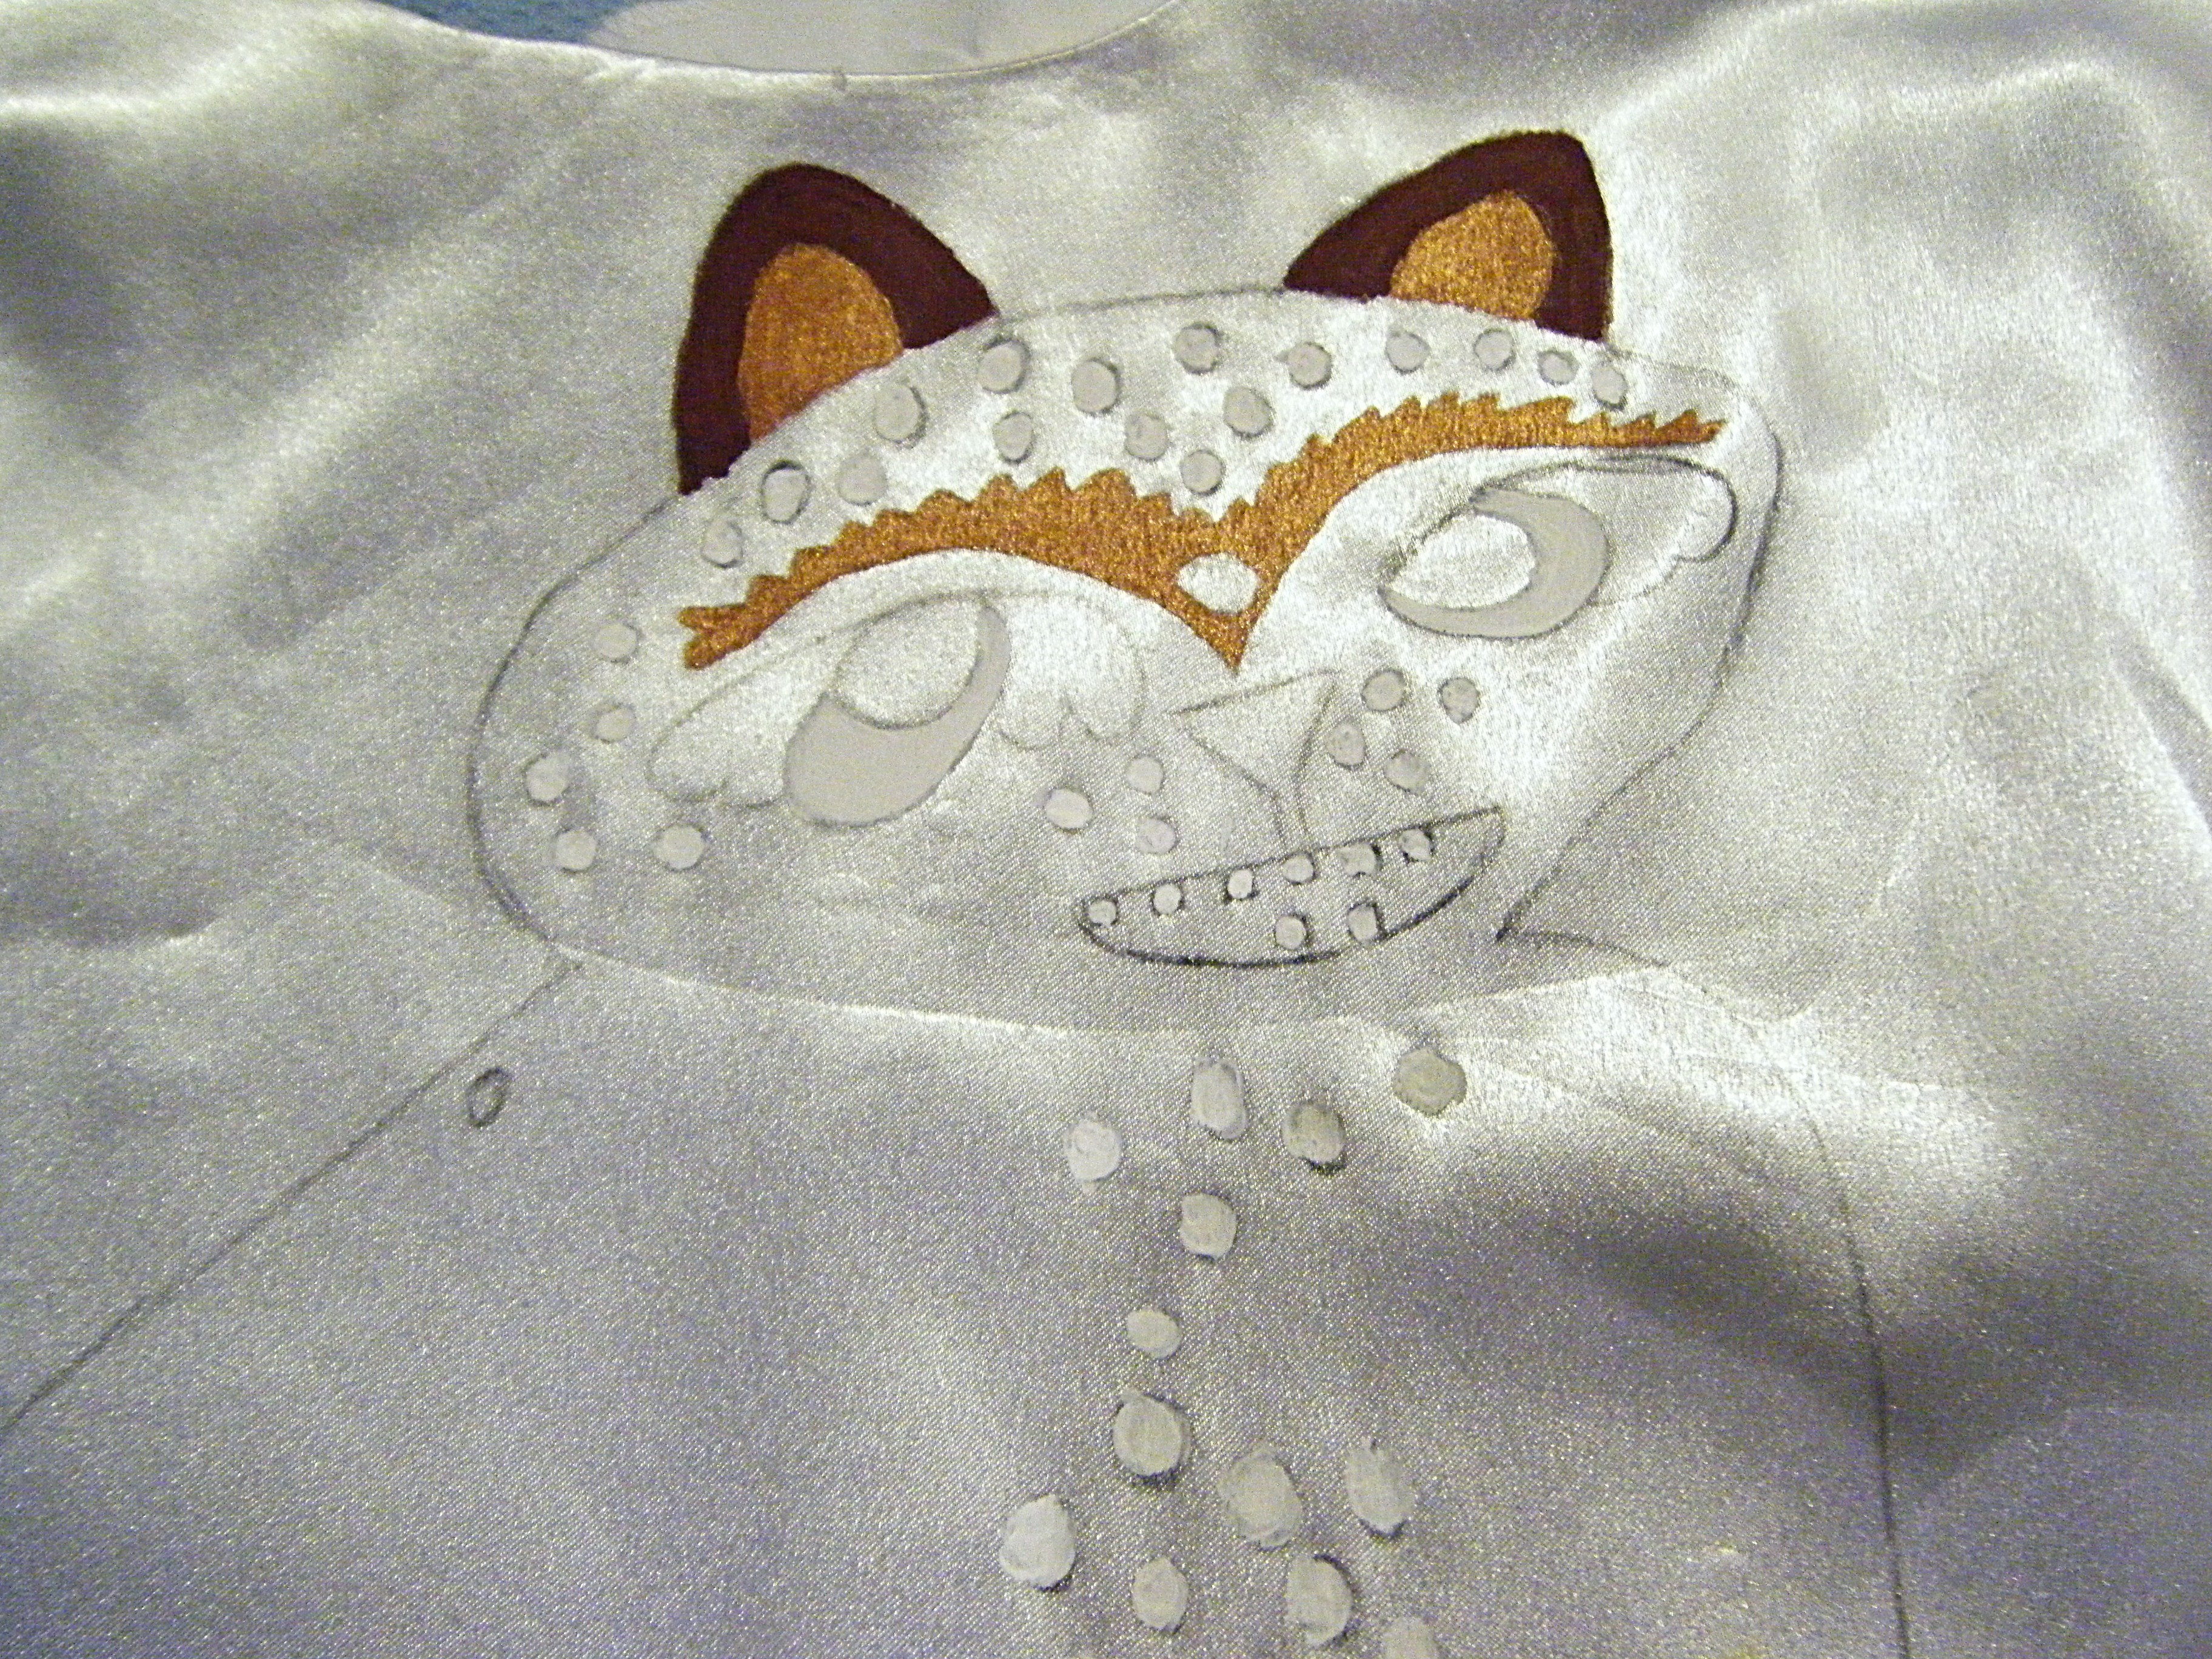
Pin the tracing paper down on the dress and press down with a sharp 2B pencil but just fill in the outline of the cat drawing, and any light-coloured features (eg. white spots). Don’t outline the darker features (no point, as you’ll probably paint over them).
Colours will be applied in this order: light to dark. Eg. white, silver, yellow… black is last.
STEP 15
Blow dry between colours. I found this difficult as I do night shift and was painting til 5am some nites, so I placed it near a fan heater.
STEP 16
When you’ve dried the light colours, get the tracing pattern out again and go over the inside features of the cat with the 2B pencil. Then press down and transfer these onto the painted dress. Then paint the inner details in dark colours.
COMMENTS
Allow about a week to paint it – about three to four hours a night.
If you’re more experienced, it would probably only take a couple of days.
There’s a lot of fiddling around and it’s all primary-school level ability – you just have to be patient and put aside plenty of time.
I found keeping a steady hand while painting was the hardest bit. I ended up with it over my faux furry jacket (don’t wear faux fur, it’ll end up catching the paint in the cuffs). Also, my woollen cap — it was winter here — was covered in splotches. Use dishwashing detergent to remove.
When I saw the original at ABBAWorld, mine looked better and brighter. Also, the original is on cotton material, which is much easier to wash. I was surprised, as it looked like satin in the photos.
If I made these again, I’d prefer to do them on cotton, as they’d be easier to paint and wash. The satin paints have already slightly cracked and they were impossible to set with a hot iron (as per instructions on the paint bottles) because the five layers of paint I applied kept getting sticky when I put the iron on it. The costume is like a delicate artwork, lying flat/unbended at all times and not easily washable. I definitely won’t be adding any beads to it, as it’s too delicate now, and would just crack.
Bought a pair of long white boots on eBay for $30.
I’ll probably wear it to niteclubs once/twice a year at most. I love it and am very happy with it. It’s a dream come true to finally have an ABBA cat costume.
Hit the retro discos! “You can dance, you can jive …”


I love you!! I searched the whole net for a picture of these two cats.
LikeLike
Thanks for sharing! How do I find the pattern?
LikeLike
Love your blogg! Where Can I find the patern?
LikeLike